Saturday, September 7, 2019

Jayne's Artichoke Dip


INGREDIENTS
1 pint (2 c.) plain yogurt
1 pt (2 c.) mayonnaise (may use all mayo)
2 T. curry powder
2 T MSG
8-10 drops Tobasco sauce
8-10 drops soy sauce
1 drop yellow food coloring (optional)

HOW
Combine and whisk together until blended. 
Chill and serve.

NOTES
*To make it dairy free, substitute all mayonnaise for yogurt.
*Food coloring is VERY unnecessary.
*Recipe is easily halved or quartered.
*Don't know any substitute for MSG. Note that claims regarding the unhealthfulness of MSG have been proven to be false.

Artichokes

Artichokes

  1. Rinse well. Cut off the stem flush with the choke. Trim leaf stickers with kitchen scissors.
  2. In a pan or pot big enough for the artichoke(s) to stand upright on the stem end, add ABOUT: 1" water, 1 T. oil, 1-2 T. dried minced onion, 2-3 t. minced garlic, splash of lemon juice, 1/4 t. salt, 1/2 t. pepper.
  3. Dip chokes in the water before heating so leaves get coated with oil, lemon, etc.
  4. Place artichokes in the pan, bring to a boil, cover, reduce heat, and simmer 45 minutes or until base is fork-tender.
  5. Remove and drain upside down.
  6. Serve with Jayne Slade's Artichoke Dip

Friday, August 30, 2019

Fluffy Pancakes

Jim’s Fluffy Pancakes
page1image3203114464
INGREDIENTS
Pancakes
1-1/4 c. almond flour
4 medium eggs (see notes below)
1/4 c. honey
2 Tbs. vanilla (containing vanilla and alcohol only)
1/4 tsp. salt
1/4 tsp. baking soda
1 Tbs. real butter


Homemade Fruit Jam
Fruit of your choice, fresh or frozen (I

like to use frozen strawberries) Honey to taste
1 packet Knox Gelatin


INSTRUCTIONS
For Pancakes: Mix all ingredients together in a blender for a light, fluffy texture. Pour onto a buttered
electric griddle (preferably) set at 275 degrees or a buttered pan. Cook slowly until golden brown; a bit longer than for regular flour pancakes. Serve with warmed honey and/or Homemade Fruit Jam.

For Jam: Microwave fruit in a small dish for three minutes or cook down in a small pan. Mash fruit with fork and blend with honey and gelatin. Serve with Jim’s Fluffy Pancakes. Refrigerate leftovers; gelatin will help jam to solidify when cooled.

Notes: If large eggs are used and batter seems too thin, add additional almond flour to make a normal pancake batter. If cooked pancakes don’t puff up, make sure you are using fresh baking soda.
page1image3203199920page1image3203200176
NoMoreCrohns.com

August 2019

Wednesday, June 12, 2019

Pulled Pork Sliders (meatless, vegan, jackfruit)

https://www.traderjoes.com/recipes/lunch/pulled-jackfruit-sandwich

How does one use Trader Joe's Green Jackfruit in Brine, you ask? It takes on a “meaty” texture, and, much like tofu, absorbs the flavors of sauces. Our favorite preparation involves cooking jackfruit in barbecue sauce, where it eventually shreds like pulled pork, ready to be piled on a warm Honey Wheat Hamburger Bun and crowned with crunchy cabbage.

INGREDIENTS


    For Pulled Jackfruit
  • For Tangy Cole Slaw

DIRECTIONS

Prepare Pulled Jackfruit: Drain jackfruit and pat dry. Partially shred jackfruit chunks into smaller pieces. In a sauté pan, heat olive oil over medium heat. Add jackfruit and sauté for five minutes. Add BBQ sauce and water to pan and stir to evenly coat jackfruit. Cover pan and simmer on medium-low heat, 20-25 minutes, stirring occasionally and pulling jackfruit apart as it becomes tender.
Prepare Tangy Cole Slaw: While jackfruit cooks, in a large bowl, toss cabbage blend with mayonnaise and apple cider vinegar to coat. Season with salt and pepper to taste and set aside.
Prepare Sandwiches: Place a scoop of pulled jackfruit on the bottom of a bun. Top with diced onions, coleslaw, and bun top. Eat and repeat until satisfied!

Saturday, April 20, 2019

Spinach Mushroom Kugel

From Jamie Geller, Aug 17, 2011
https://www.joyofkosher.com/recipes/spinach-mushroom-kugel/

INGREDIENTS
1 - 1lb pkg frozen spinach, thawed and squeezed dry
1- 8oz sliced mushrooms (canned is okay - be sure to drain)
2 eggs, separated, whites whipped
1/2c. mayonnaise
2T onion soup mix (see below for Homemade Healthy Onion Soup Mix)

PREPARATION
1. Preheat oven to 350°f.
2. Place all ingredients in a large bowl and mix until well combined.
3. Pour into a 9" round baking dish and bake for 45-50 min.

Note: recipe can be doubled and cooked in a 13 x 9 x 2" Pyrex

HOMEMADE HEALTHY ONION SOUP MIX (makes ~3 T)
1 t. turmeric
1 T sugar
1/2 t celery seed
2 T + 2 t dried minced onion
1/4 t ground black pepper

Combine all ingredients and store in an airtight container until ready to use. Should keep up to 1 yr.

Thursday, January 31, 2019

Roasted Red Pepper and Pecan Spread/Dip

INGREDIENTS
1 - 12 oz jar roasted red peppers, diced
1/4 c. sun dried tomatoes, packed in oil, drained and patted dry with paper towel
1/4 c. coarse whole wheat bread crumbs (for gluten free substitute almond meal)
1 c. pecans pieces, unsalted, roasted (do not char or burn)
1 clove garlic, minced
1 T. red wine or balsamic vinegar
1/2 t. ground cumin
1/4 t. ground paprika
1/4 t. salt
--------
1/4 c. extra virgin olive oil

DIRECTIONS
1. Into a food processor add each ingredient in order, excluding the olive oil. Pureé until smooth.
2. With the food processor running, add olive oil in a slow stream, blending until incorporated.

Yields 3 c.

Note: Can be made up to 2 days ahead and refrigerated. Bring to room temperature before serving. Goes well with crackers and raw vegetables.

Recipe obtain from Maria Hutkin.

Thursday, November 29, 2018

Creamy Chipotle Taco Sauce

CREAMY CHIPOTLE TACO SAUCE
From Skinnytaste.com and Mom (Jayne Slade)
INGREDIENTS 
1 cup light mayonnaise (may use ANY type of mayo or vegetarian mayo)
2 T chopped fresh cilantro
1 T. honey
2 canned chipotle chilies in adobo ( 2 T.)
Juice of 1 lime (~2 T.)
DIRECTIONS
Combine mayo, cilantro, honey, chipotles, lime juice and salt in food processor or blender, blending until smooth.  Transfer to a container like a squeeze bottle and refrigerate.
Buy a can of chipotle chilies in adobo sauce.  Open and puree in blender, transfer to glass jar for storage in refrig.  It lasts forever that way and is much more recipe friendly.

Sunday, November 11, 2018

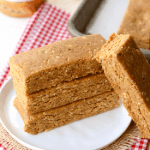
Peanut Butter Protein Bars

PEANUT BUTTER PROTEIN BARS

  • PREP TIME:15 mins
  • TOTAL TIME:15 mins
AUTHOR: Lee Hersh
YIELD: 10

https://fitfoodiefinds.com/peanut-butter-protein-bars/

INGREDIENTS

INSTRUCTIONS

  1. Spray a 9×9-inch cake pan with coconut oil cooking spray or line with parchment paper and set aside.
  2. Place rolled oats in a high-speed food processor (I use a Ninja). Process on high for about 30 seconds or until you’ve turned your oats into an oat flour.
  3. Add in the rest of the ingredients to your food processor and process on high for 1 to 2 minutes, stopping often to scrape the sides. You’ll want to make sure you use a drippy peanut butter for this recipe (Trader Joe’s or Kirkland brands are the best). At this point, the dough should be similar to cookie dough.
  4. Using your hands, press the dough into the cake pan. Then, use a spatula to make it smooth and even all the way around.
  5. Pop the cake pan into the freezer for about 30 minutes to set. Remove and then cut into 10 bars with a sharp knife.

NOTES

You can also make these bars into balls for an easier recipe and smaller serving size! It will make around 25 1 tablespoon-sized balls.

NUTRITION

  • Serving Size: 1 bar
  • Calories: 342
  • Sugar: 30
  • Fat: 14
  • Carbohydrates: 47
  • Protein: 13

Faux Ice Cream - Chocolate Peanut Butter Banana

Faux Ice Cream - Chocolate Peanut Butter Banana
https://thestayathomechef.com/healthy-ice-cream/
MODIFIED
Prep Time
5 mins
Total Time
5 mins
Learn how to make Healthy Ice Cream using a handful of ingredients and it's ready in under 5 minutes! Whether you need a dairy-free dessert option, or you need a healthy treat to satisfy, this one is for you!
Course: Dessert 
Yield2 Servings
Calories157 kcal
Ingredients
  • 2 bananas peeled and frozen
  • 1 tablespoon peanut butter
  • 1 tablespoon cocoa powder
  • 1-4 tablespoons unsweetened almond milk
PRO TIP: This recipe works best with bananas that have ripened to the point where they have little black spots appearing. Bananas have various stages or ripeness and become sweeter as they progress, with a less pronounced banana flavor.
Instructions
  1. Cut the frozen bananas into chunks and put them in a food processor or heavy duty blender (or a Yonanas Machine).
  2. Blend until smooth.
  3. Add in the desired flavor (in this case peanut butter and cocoa powder), and blend until everything is incorporated and smooth.
    4. Add almond milk 1/2 to 1 tablespoon at a time to aid in blending and make smooth.
Recipe Notes
Other flavor ideas that we like:
Strawberries (just blend a handful in with the bananas)
Coconut and Chocolate (2 tablespoons coconut milk or coconut oil +1 tablespoon cocoa powder)
PB Banana (just add 2 tablespoons peanut butter
PB and Jelly (1 tablespoon peanut butter + 1 tablespoon strawberry jelly)
Nutrition Facts
Faux Ice Cream - Chocolate Peanut Butter Banana
Amount Per Serving
Calories 157Calories from Fat 36
% Daily Value*
Total Fat 4g6%
Saturated Fat 1g5%
Sodium 38mg2%
Potassium 512mg15%
Total Carbohydrates 29g10%
Dietary Fiber 4g16%
Sugars 15g
Protein 3g6%
Vitamin A1.5%
Vitamin C12.4%
Calcium0.6%
Iron4.5%
* Percent Daily Values are based on a 2000 calorie diet.

Friday, November 9, 2018

PUMPKIN MAPLE PECAN GRANOLA

https://minimalistbaker.com/pumpkin-maple-pecan-granola/
Simple, healthy granola that's perfect for fall! Just 9 ingredients, perfectly crunchy, and infused with tons of pumpkin flavor and fall spices.
Freezer: 3 months
Keeps: 2-3 wks

Ingredients

  • 3 cups rolled oats (gluten-free for GF eaters)
  • 1 1/4 cups raw pecans
  • 1/3 cup raw pepitas
  • 3 Tbsp sugar
  • ¼ tsp sea salt
  • 3/4 tsp pumpkin pie spice (I also added an extra dash cinnamon)
  • 1/4 cup coconut or olive oil
  • 1/3 cup maple syrup (or sub agave or honey if not vegan)
  • 1/3 cup pumpkin puree

Instructions

  1. Preheat oven to 340 degrees F (171 C).
  2. Mix the oats, nuts, seeds, spices, sugar, and salt together in a large bowl.
  3. In a small saucepan over medium-low heat, warm the coconut oil, maple syrup, and pumpkin puree and whisk. Pour over the dry ingredients and quickly mix with a wooden spoon.
  4. Spread the mixture evenly onto two baking sheets (or bake in two batches // adjust if altering batch size) and bake for 23-33 minutes, stirring a bit near the halfway point. If you prefer chunkier granola, don’t stir as it breaks up the clusters. Instead, just rotate the pans at the halfway point to ensure even cooking.
  5. Once the granola is golden brown (usually about 25 minutes), remove from oven and let cool completely. It will crisp up as it cools.
  6. Transfer to an airtight container. Should keep for a couple weeks. Enjoy with almond milk, dairy-free yogurt, or on top of oats!

    Notes

    *Adapted from my Sweet Potato Granola.
    *Nutrition information is a rough estimate.
    *Recipe makes ~4 1/2 cups granola.

    Nutrition Per Serving (1 of 18 quarter-cup servings) 

    • Calories: 170 
    • Fat: 10.7g 
    • Saturated fat: 3.5g 
    • Sodium: 2mg 
    • Carbohydrates: 16.9g 
    • Fiber: 2.5g 
    • Sugar: 6g 
    • Protein: 3.4g

Monday, August 28, 2017

Greek Fava (yellow split pea pureé)

Authentic Greek Fava (yellow split pea puree)
A delicious traditional veggie dish straight from the island of Santorini! Creamy and super tasty, the perfect starter for a cold winters day. If you’ve been looking for a fava recipe that actually tastes like the one served in Greece, then you have to try this authentic Greek fava recipe. Serve as a delicious appetizer or dip with a drizzle of extra virgin olive oil. Enjoy!
http://www.mygreekdish.com/recipe/authentic-greek-fava-recipe-yellow-split-peas-puree/

Ingredients
500g/18oz yellow split peas
3 red onions, roughly chopped
2-4 cloves garlic, finely chopped
1 ltr/3 1/3c warm water
juice from 2 lemons
1/3c olive oil
thyme (fresh if available)
salt and freshly ground pepper
Optional: extra red onion, capers, and/or parsley

Instructions
1. Thoroughly rinse split peas.

2. Heat large pot over medium-high heat. Add 2-3T olive oil, chopped onions and garlic, and fresh thyme, and sauté.

3. As soon as onions begin to caramelize add the peas and stir well. Pour in warm water and remaining olive oil. Bring to slight boil and reduce heat to medium. Season with salt and pepper, and simmer, covered, for 40-50 min. until peas are soft and mushy. Stir regularly. If white foam forms on the surface of the water, use a slotted spoon to remove it.

4. When cooked, stir in lemon juice and transfer to a food processor. Process until peas become smooth and creamy pureé.

5. Serve fava with drizzle of olive oil, a tablespoon of chopped red onions, ground pepper, and some capers or parsley. Spread on pita or sourdough bread (for a California twist mash avocado on the bread first).


Thursday, June 1, 2017

Phil's (Maffetone) Bars

(Modified)
"Have these on hand for a quick meal or snack, race energy, and even travel food. In addition to being a low glycemic, easy to digest meal with complete protein and healthy fats, they are absolutely delicious."

Dry Ingredients:
3 c (450g) raw almonds
2/3 c (60g) egg white powder
1/4 c (22g) dark cocoa powder (regular is fine)
1/2 c (35g) shredded coconut, unsweetened
pinch of sea salt or Himalayan salt

Wet Ingredients:
1/3 c honey or maple syrup
1/3 c hot water
2 t vanilla extract

Instructions:

  1. Grind almonds in a food processor
  2. Add egg white powder, cocoa powder, and coconut. Mix thoroughly and transfer to a mixing bowl.
  3. In a measuring cup combine wet ingredients. For sweeter bars raise ratio of honey to water.
  4. Blend wet ingredients into dry and mix thoroughly using an electric mixer. If batter is too wet, add a bit more dry ingredients. If too dry, add bit more wet.
  5. Form into bars or press into a baking dish (8 x 8 works well).
  6. Optional: bake bars for 20-40 min in a barely heated (~175* f.)
  7. Cut into bars or bites. Store at room temperature or in refrigerator. They should keep for at least a week.
Nutrition Facts (per bar - recipe makes 12):
Calories 285
Carbohydrates 12g
Protein 12g
Fat 21g


https://philmaffetone.com/recipe/phils-bar/
https://philmaffetone.com/phils-bars-revisited/

Wednesday, April 12, 2017

SLADE'S BBQ SAUCE

Simple and delicious. Refrigerate leftover sauce.
1 c catsup
1/4 c vinegar, white
1/4 c brown sugar
1/4 t chili powder
1 c water
1/4 c Worchestershire sauce
1/4 t celery seed
1/2 t instant minced onions (or 1/8-1/4 c very finely chopped fresh onion)

Combine ingredients and bring to a boil in sauce pan. Simmer uncovered about 25 min to remove vinegar taste.

This is from the early 1960's and was a key part of to the spare ribs my father BBQed, usually in the summer. It was also used on our baked or bbq-ed pork chops.

Monday, February 13, 2017

Mushroom Barley Soup

By Tony Litwinko - Bon Appetit December 1995
http://www.epicurious.com/recipes/food/views/mushroom-barley-soup-993
8 Servings

INGREDIENTS
1/4 c butter (1/2 stick)
1 lb mushrooms, cut into 1/2" pieces
2 large carrots, chopped
2 large celery stalks, chopped
1 onion, chopped
1/2 c pearl barley, rinsed
8 c vegetable broth
2 T flour
1/4 c chopped fresh parsley
1 T chopped fresh dill or 1 t dried dill

PREPARATION
1. Melt butter in heavy large Dutch oven over med./medium-high heat. Add mushrooms, carrots, celery, onion, and barley. Saute until vegetables begin to brown, about 20 minutes.

2. Add flour to pot and stir 5 minutes.

3. gradually mix in broth. Bring to boil, stirring frequently. Reduce heat to medium and simmer until barley is tender and soup is beginning to thicken, 40 or more minutes.

4. Mix in parley and dill. Season to taste with salt and pepper.

Thursday, December 22, 2016

How to Season a Cast Iron Skillet

How to Season a Cast Iron Pan (It's Easier Than You Think!)

By Daniel Gritzer
http://www.seriouseats.com/2016/09/how-to-season-cast-iron-pans-skillets-cookware.html
Read and reposted here - December 2016

Online forums for the cooking-obsessed are a mixed blessing. On the one hand, they can be amazing resources, full of detailed information on all sorts of topics. But they can also expose just how little agreement there often is among experts when you get down to the nitty-gritty details. I've spent hours poring over cast iron cookware sites, only to see some swear that flaxseed oil is the best for seasoning, others throw down for Crisco or lard, and still others say that canola is their go-to. The oven temperatures they use are equally varied, and some advocate convoluted methods that involve repeatedly changing the oven temperature during the seasoning process.
The thing is, we here at Serious Eats use our cast iron cookware to death, and, after testing countless methods, we've found that most of the complex rules of cast iron are nothing more than superstition. Indeed, we don't do anything complicated to keep our pans in tip-top nonstick shape. Here's the short version of what you need to know: When you get a new cast iron pan, put it through one basic round of seasoning (I'll explain how below), then just...use your pan. Yeah, it really is that simple.
UNDERSTANDING SEASONING
A cast iron pan is, quite literally, a big hunk of iron molded into the shape of cookware. Iron, on its own, is gunmetal gray and highly reactive, able to rust within minutes in humid air alone. Try to cook in a bare iron pan, and not only will the rusting be a problem, but your food will stick to it as well.
What you need is seasoning.
Seasoning, in this case, has nothing to do with salt or spices. Instead, it describes a hard, protective coating that's formed by heating incredibly thin layers of fat (like oil) on the cast iron. As the fat is heated, it bonds to the metal and to itself in a process called polymerization, as the fat converts into a form of plastic. After enough layers of seasoning have been applied, what you end up with is not a greasy coating but a hard, blackened skin that protects the metal. Fortunately for us cooks, it also has nonstick properties that make even the most stick-prone foods (think: fried eggs) a pleasure when using cast iron.
SEASONING YOUR NEW CAST IRON PAN
When you buy a new cast iron skillet, it almost always comes from the factory with some degree of pre-seasoning on it, but you'll generally want to lay down a few more on top of that to make sure it's good. (If you get a vintage skillet that's not in great shape, you'll want to consult our guide to restoring cast iron, which includes instructions on how to strip off old seasoning and rust.) Once you've added your own layers of seasoning, just use the pan, and you'll be good to go for years upon years.
STEP 1 WASH AND DRY YOUR PAN
It's hard to say exactly what happened to that skillet between the time it came off the factory line and when it arrived in your kitchen, so you'll want to wash it before starting to season. Give the pan a good scrub with warm, soapy water, then dry it thoroughly. Even after towel-drying, some surface moisture may remain, so your best bet is to put the pan on a stovetop flame for a minute or two to drive off any lingering water.
STEP 2 RUB IT ALL OVER AND BUFF WELL
Now that your pan is clean and dry, rub it all over, inside and out—including the handle—with cooking oil. Here at Serious Eats, we're fans of unsaturated cooking fats, like vegetable, canola, and corn oil, for seasoning our pans. Not only do we always have them on hand, but they work well and are easier to spread than saturated fats, like shortening or lard. There's no need to go out and buy any special oils just for seasoning!*
* For the record, we've found that the often-suggested flaxseed oil produces a fast layer of seasoning, but it has a tendency to flake off with use. We don't recommend it.
The key here is to rub the oil all over, but then buff it so thoroughly that the pan no longer looks even the slightest bit greasy. Even a small amount of excess oil on the pan can pool during seasoning, forming little hardened droplets on your cooking surface, or turn sticky if left unused for a few days.
STEP 3 HEAT IT IN THE OVEN
Put the oiled pan in a preheated 450°F oven, and leave it there for 30 minutes. It may get a little smoky, so keep your kitchen well ventilated. It's during this time that the oil will polymerize and form the first of several hard, plastic-like coatings you'll be laying down.
The reason we're using the oven here is because it provides an even heat that will more effectively set the oil all over the pan. Even the best stovetop burners will produce hot and cool spots, which can lead to uneven initial seasoning. 
While it's not essential, especially if you've buffed away all the excess oil, I like to turn the pan upside down and put a baking sheet or piece of foil underneath. It's just added insurance against any excess oil that decides to run and pool, since gravity will pull it out of the pan.
STEP 4 REPEAT 3 TO 4 TIMES
When the half hour is up, take the pan out. (Remember: It's hot!) Now rub it once more all over with the oil, buffing it out as before. Then put it back in the oven for another 30-minute spell. All in all, you'll want to do this oiling-and-heating process three to four times, to set down a good initial layer of your own seasoning.
Once you're done, just let the pan cool down. It's now ready for cooking.
FUTURE SEASONING SESSIONS
Some people are under the impression that cast iron is high-maintenance, requiring the above seasoning process again and again to keep the pans in great working condition. Not so! All you need to do from here on out is use your pan. Each time you cook in it with some type of fat, you'll be laying down more seasoning. Once you've got a good layer of seasoning built up, you can even use your cast iron pan for acidic foods, like tomatoes and pan sauces, without worry.
Need help thinking of things to do? Try frying chicken, pan-searing steaks, frying eggs, and sautéing vegetables. Even skillet breads like cornbread will help season the pan.
And that really is the big takeaway here: A well-seasoned cast iron skillet is a well-used one. Spending more time in the kitchen using it, and less time on online forums reading arguments about it, is an excellent first step.

Monday, October 24, 2016

Vegan Bacon Bits

Coconut Bacon Bits 

Recipe by: Rebecca Firkser
Makes: 3 cups
http://greatist.com/eat/vegan-bacon-recipe-with-coconut 

3 cups unsweetened coconut flakes
2 tablespoons liquid smoke (if you can’t find any, omit and add 2 teaspoons smoked paprika and 2 teaspoons apple cider vinegar)
2 tablespoons reduced-sodium tamari or soy sauce
1 tablespoon maple syrup or honey, if not vegan

1. Preheat oven to 300 degrees. Place coconut in a bowl, then pour in remaining ingredients.
2. Stir until coconut is completely coated. Let stand for 15 minutes.
3. Line a baking sheet with parchment paper and spread on coconut in an even layer.
4. Bake for 10-15 minutes, tossing after 5. It's OK if it doesn't seem crispy yet: The coconut will dry out more as it cools.
5. Let cool, then use as you would any bacon. We like it with eggs, on BLTs, and (of course) avo toast! Store leftovers in a freezer bag for up to three months.

Thursday, October 20, 2016

Paleo Almond Butter Banana Chocolate Chip Muffins

http://www.bakerita.com/paleo-almond-butter-chocolate-chip-banana-muffins/
Author: 
Serves: 12 muffins
Ingredients
  • 3-4 medium bananas (1⅔ cups mashed or 380 grams)
  • 3 eggs, room temperature
  • 3 tablespoons coconut oil, melted
  • 1 teaspoon vanilla extract
  • ⅓ cup (100 grams) almond butter + ¼ cup almond butter, divided
  • ⅓ cup (50 grams) coconut flour
  • ¾ teaspoon baking soda
  • ¾ teaspoon baking powder
  • ¼ teaspoon salt
  • 4 oz. dark chocolate, chopped

Directions
  1. Line a 12 pan muffin tin with paper liners and preheat the oven to 350ºF.
  2. In a large bowl or mixer, combine the mashed bananas, eggs, coconut oil, vanilla extract and ⅓ cup almond butter until fully combined.
  3. Add the coconut flour, baking soda, baking powder, and salt to the wet ingredients and mix well. Fold in the chocolate chunks.
  4. Add 1 tablespoon of batter to the bottom of each pan. Add a heaping teaspoon of almond butter to the center of each muffin. Divide the remaining batter evenly into the muffin cups, about another tablespoon of batter. Top with more chocolate chunks if desired.
  5. Bake in the preheated oven for about 20 minutes. A toothpick inserted into the center should come out clean.
  6. Remove from oven and allow to cool on a wire rack for about ½ hour. Flip out onto a cooling rack to finish cooling.
Notes
To keep the muffins Paleo and refined sugar free, use Paleo-friendly chocolate or try making your own.